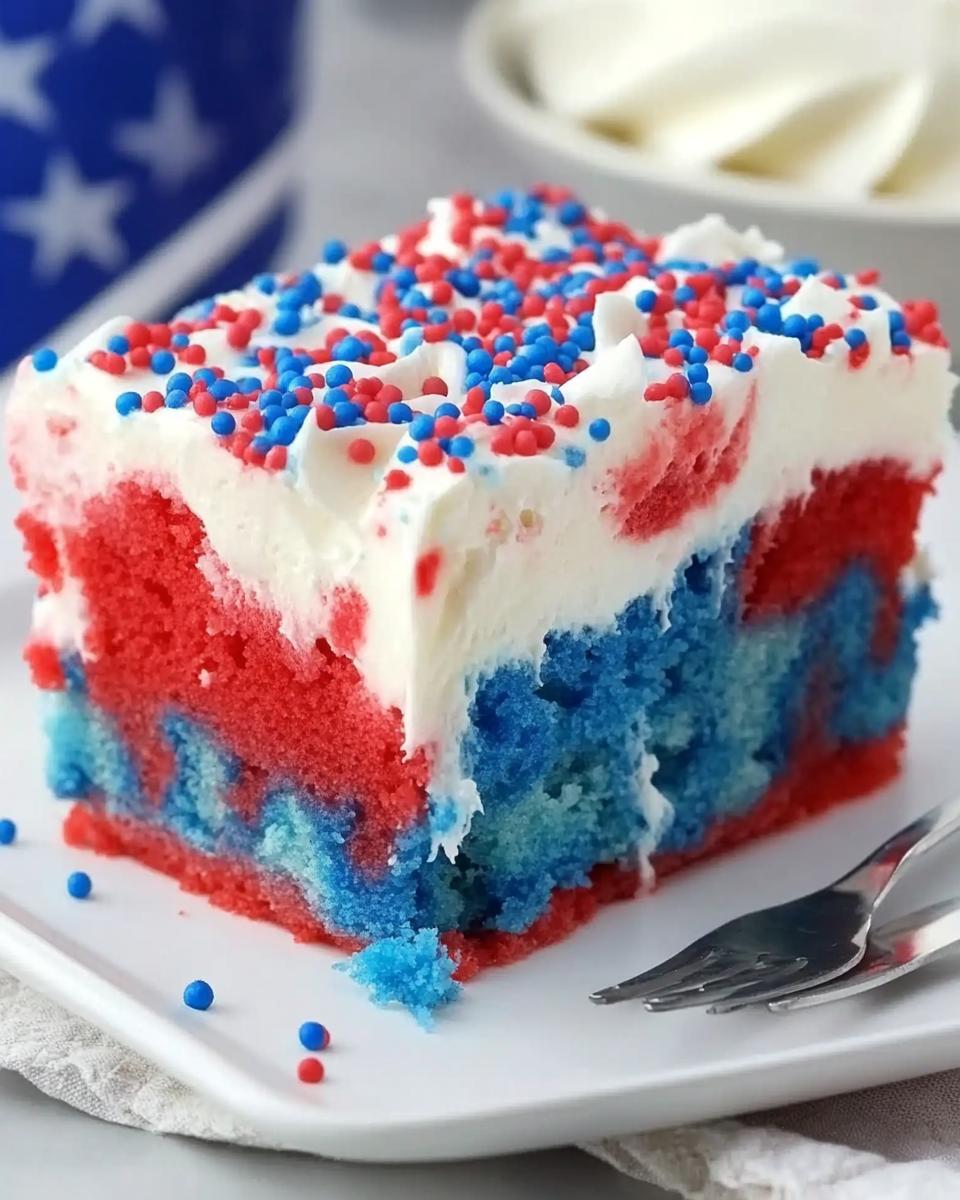
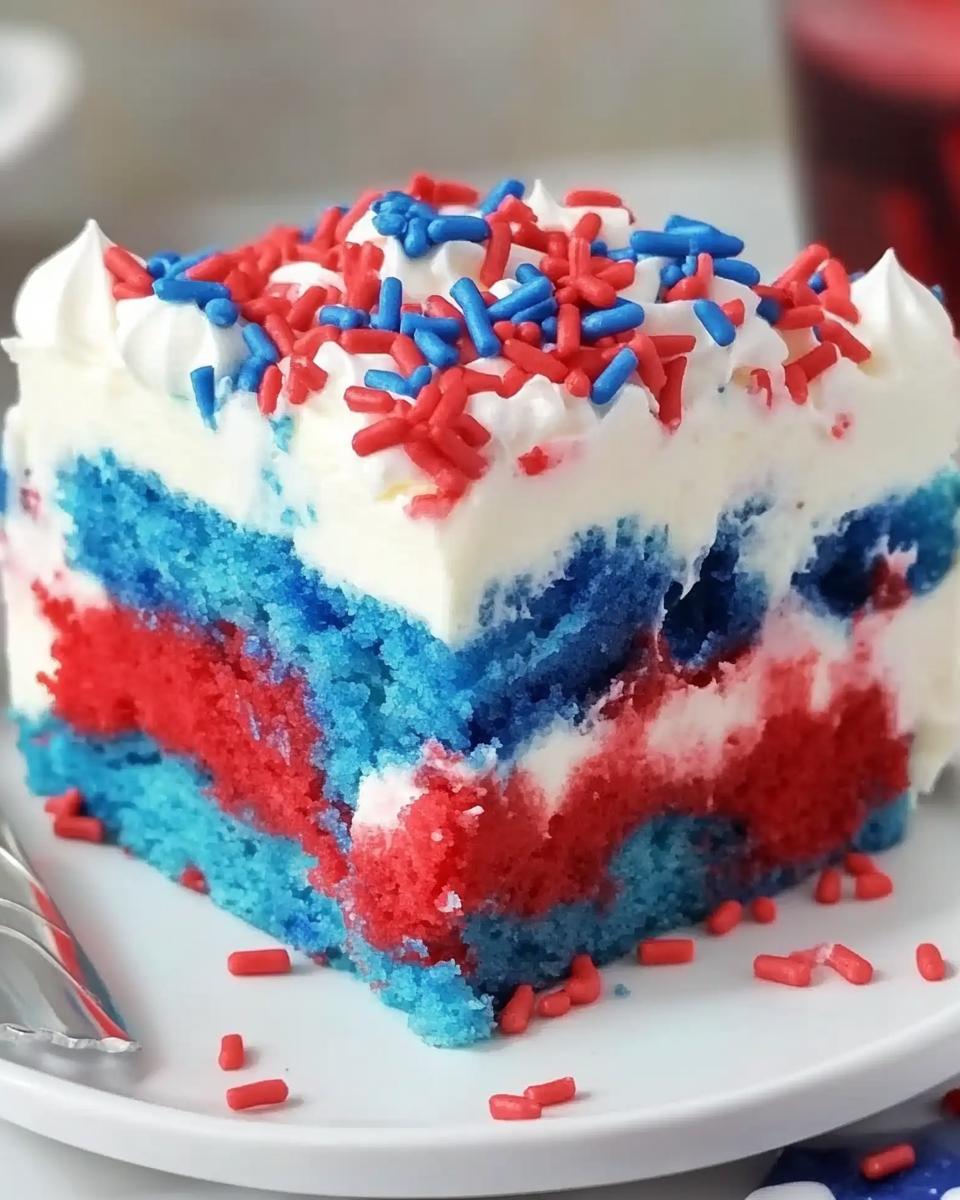
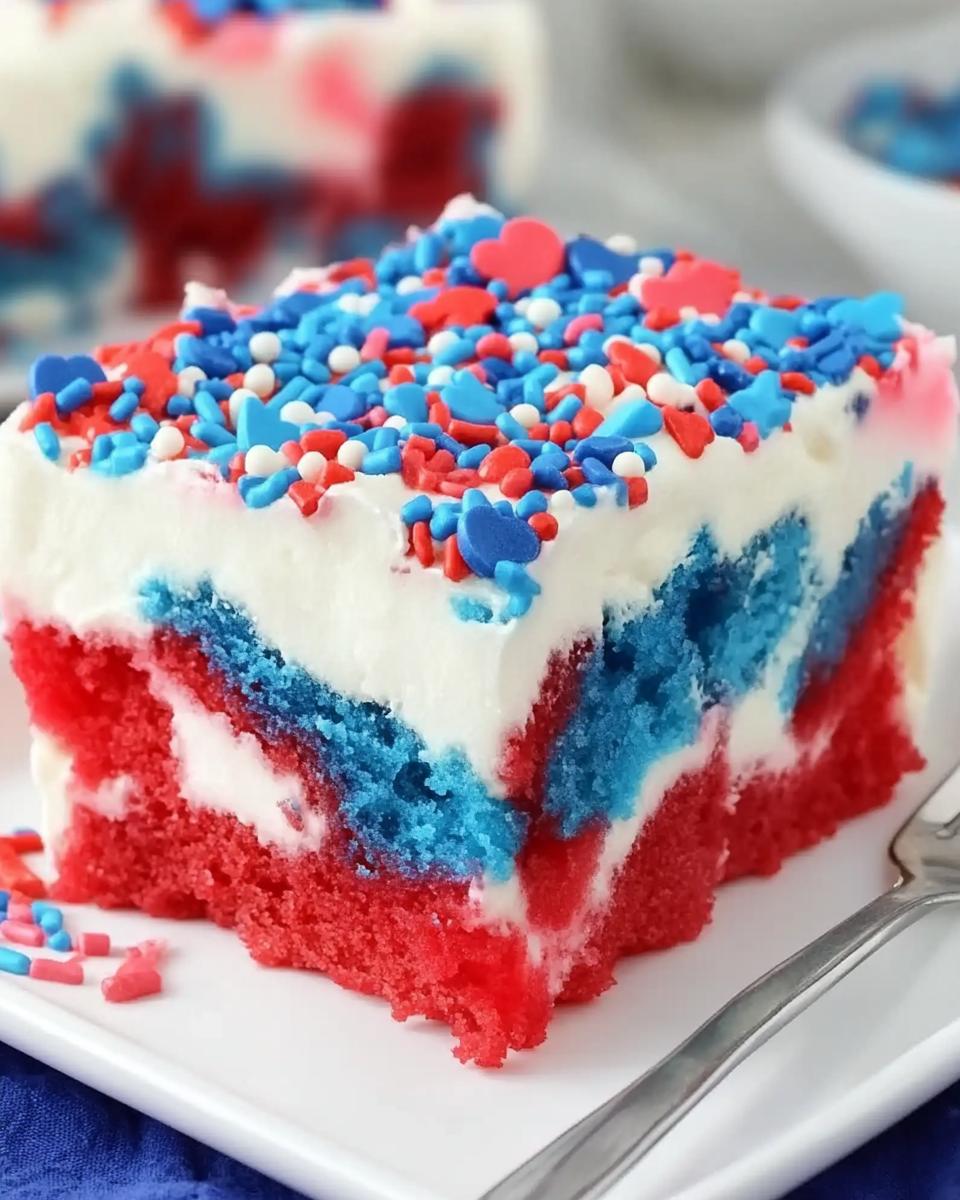
Oh my gosh, let me tell you about the most fun dessert I’ve ever made – this crazy colorful poke cake! I first stumbled onto the idea when my niece begged me to make a “rainbow cake” for her birthday party. I was sweating bullets thinking about layered frosting until I discovered poke cakes – where all the magic happens after baking! The best part? You get that wow factor with just a boxed cake mix and some food coloring. No fancy decorating skills needed.
This poke cake version is my go-to for potlucks because it’s impossible to mess up. The pudding seeps into those little holes you poke (hence the name!), making every bite ridiculously moist. Kids go nuts for the bright colors peeking through the whipped cream topping, while adults appreciate that it’s not tooth-achingly sweet. Trust me – one bite and you’ll understand why this became my most-requested dessert!
Poke Cake Ingredients
Here’s everything you’ll need to create this magical dessert – and trust me, half this stuff is probably already in your pantry! I always make sure to use name-brand cake mix (the cheap stuff just doesn’t rise as well) and full-fat dairy for the creamiest results.
- For the cake:
- 1 box (15.25 oz) white cake mix – I swear by Betty Crocker or Duncan Hines
- 3 large eggs (room temperature makes them blend better)
- 1 cup water
- ⅓ cup vegetable oil (or melted coconut oil if you’re feeling fancy)
- Blue and red gel food coloring (the liquid kind makes pastel colors – go bold with gel!)
- For the pudding layer:
- 2 boxes (3.4 oz each) instant cheesecake pudding mix (vanilla works too in a pinch)
- 3 ½ cups cold whole milk (2% works, but whole makes it extra rich)
- For the whipped topping:
- 2 ½ cups heavy whipping cream (chilled overnight is best)
- ¼ cup powdered sugar (more if you like it sweeter)
- 1 teaspoon pure vanilla extract (the good stuff makes a difference)
- Sprinkles for decorating (because everything’s better with sprinkles!)
Pro tip: Set your mixing bowl and beaters in the freezer for 10 minutes before whipping the cream – it’ll hold its shape way better. And don’t skimp on the gel food coloring – those little bottles last forever and give you those vibrant colors that make kids (and let’s be honest, adults too) go “WOW!”
How to Make Poke Cake
Okay, let’s dive into the fun part – turning these simple ingredients into a showstopper dessert! I’ve made this poke cake so many times I could probably do it in my sleep, but I’ll walk you through each step carefully. The secret is in the layers – and don’t worry, it’s way easier than it looks.
Prepare the Colored Cake Batter
First things first – preheat your oven to whatever temperature your cake mix box says (usually 350°F). Grab a 9×13-inch baking dish and spray it really well with baking spray – you don’t want any cake sticking!
Now, mix up your cake batter exactly like the box instructions say. Here’s where the magic happens: divide the batter evenly into three bowls. Keep one plain white (this creates pretty contrast). Add blue gel food coloring to the second bowl and red to the third. Start with just a drop or two of coloring – you can always add more!
Now the fun part: drop spoonfuls of each color randomly into your greased pan. Alternate them so you get a nice marble effect. Tap the pan gently on the counter to even out the batter, then take a toothpick and make just a few swirls. Don’t overdo it – you want distinct colors, not mud!
Bake and Poke the Cake
Pop that beauty in the oven and bake according to package directions, usually about 25-30 minutes. When a toothpick comes out clean, take it out and let it cool for exactly 10 minutes – no longer!
Here’s the signature poke cake move: grab the handle of a wooden spoon (about 1/4-inch diameter) and poke holes all over the cake, about 1 inch apart. Don’t be shy – poke all the way to the bottom! Let the cake cool completely before moving to the next step (patience is hard, I know).
Layer Pudding and Topping
While the cake cools, whisk together your pudding mixes and cold milk for about 2 minutes until thickened. Pour about 3/4 of this mixture over the cooled cake, spreading gently to fill all those holes you made. Refrigerate for 30 minutes to let the pudding set.
Now for the crowning glory: whip that chilled heavy cream with powdered sugar and vanilla until stiff peaks form. Spread this dreamy cloud over your chilled cake, then dollop the remaining pudding on top and swirl it artistically through the whipped cream. Finish with a rainbow of sprinkles (because why not?).
Chill for at least 2 hours before serving – those layers need time to become best friends! The wait is torture, but oh-so-worth it when you see everyone’s faces light up at first bite.
Why You’ll Love This Poke Cake
Listen, I know there are a million cake recipes out there, but this poke cake? It’s special. Here’s why it’s become my secret weapon for every party, potluck, and “I need dessert NOW” emergency:
- Easiest fancy-looking dessert ever – No decorating skills required! The colors and pudding do all the work for you. I’ve made this half-asleep at 6 AM for school bake sales and still gotten compliments.
- Customizable to any occasion – Swap the food colors to match holidays (green and red for Christmas, pastels for Easter) or use team colors for game day. Last summer I did a red, white, and blue version that disappeared before the fireworks started!
- Crowd-pleaser magic – Kids go nuts for the bright colors, adults love the not-too-sweet cheesecake pudding layer. My picky nephew who “hates cake” somehow always manages to eat three slices of this.
- No frosting stress – The whipped cream topping is practically foolproof compared to buttercream. Even if your swirls look like a toddler did them (been there), the sprinkles hide all sins!
Seriously, this poke cake is the dessert equivalent of that one friend who’s always fun but never high-maintenance. It never lets me down, and I bet it’ll become your go-to too!
Poke Cake Tips for Success
After making this poke cake more times than I can count (seriously, my neighbors start asking for it if I go too long without baking one), I’ve picked up some tricks that make all the difference between “good” and “OMG I need this recipe!” Here are my absolute must-know tips:
Gel food coloring is your best friend
Listen, I learned this the hard way when my first attempt turned out looking like a sad watercolor painting. Liquid food coloring makes the batter too runny and gives you wishy-washy pastels. Gel coloring? That’s where the magic happens! Just a tiny dab gives you those vibrant, bakery-quality colors. My favorite trick is dipping a toothpick into the gel and then swirling it into the batter – you get way more control over the color intensity.
Chill everything for the whipped cream
There’s nothing sadder than limp whipped cream sliding right off your beautiful cake. Here’s my foolproof method: pop your mixing bowl and beaters in the freezer for 10 minutes before starting. Use cream that’s been chilling in the fridge overnight – none of that “I’ll just set it out to warm up” nonsense. And if your kitchen is hot, place a bowl of ice water under your mixing bowl while whipping. Trust me, these extra steps make all the difference in getting those picture-perfect peaks!
Cooling is not optional
I know, I know – when that amazing cake smell fills your kitchen, you want to dive right in. But hear me out: letting the cake cool for exactly 10 minutes before poking (no more, no less!) prevents a soggy mess. The cake is still warm enough to absorb the pudding beautifully but has set enough to hold its structure. And that second cooling period after adding the pudding? Non-negotiable. It gives the layers time to become best friends in the fridge. My grandma always said, “Good things come to those who wait,” and she was right – the flavors develop so much better after that chilling time.
One last pro tip: if you’re transporting this to a party (which I do all the time), keep it chilled until the last possible minute. I once made the mistake of leaving it in a warm car for an hour – let’s just say my “red, white, and blue” cake turned into a patriotic puddle! Learn from my mistakes, friends.
Poke Cake Variations
One of the best things about poke cakes? They’re like a blank canvas waiting for your creative touch! I’ve experimented with dozens of variations over the years – some winners, some… well, let’s just say they were learning experiences. Here are my absolute favorite twists that always get rave reviews:
Flavor Swaps That Work Like Magic
While the classic cheesecake pudding version is divine, sometimes you want to shake things up. Chocolate lovers will adore using chocolate cake mix with chocolate pudding – it’s like a grown-up version of those chocolate pudding cups we loved as kids! For summer parties, I swap in lemon cake mix with vanilla pudding and add lemon zest to the whipped cream – so refreshing.
My husband’s favorite is when I use devil’s food cake with banana pudding (add sliced bananas on top if you’re feeling fancy). And for holiday gatherings, spice cake with butterscotch pudding feels like a cozy hug in dessert form. The possibilities are endless!
Seasonal Sprinkle Ideas
The sprinkle game is where you can really have fun with poke cakes. For Halloween, I do orange and black batter with purple pudding and spooky sprinkles. Valentine’s Day calls for pink and red batter with heart-shaped sprinkles (bonus points if you arrange them in a pattern!).
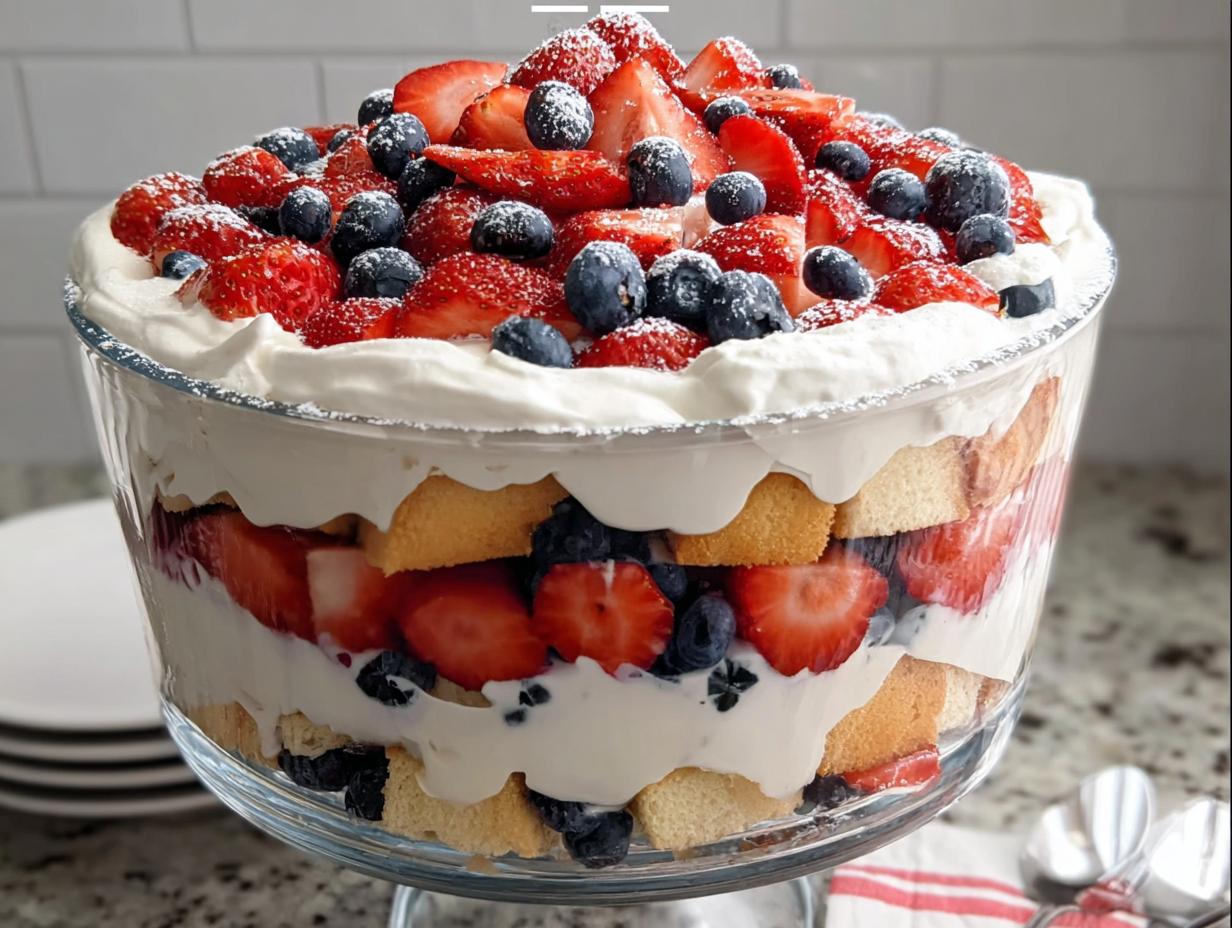
One of my proudest moments was a Fourth of July poke cake with red, white, and blue layers – I used patriotic star sprinkles and arranged blueberries and sliced strawberries in a flag pattern. The kids at the barbecue went wild for it!
Beyond Sprinkles: Creative Toppings
While sprinkles are always a hit, sometimes you want something a bit more sophisticated. Crushed Oreos make an amazing topping for chocolate poke cakes. For a tropical twist, try toasted coconut flakes with diced mango. And for fall, caramel drizzle with chopped pecans is absolutely to die for.
The beauty of poke cakes is that once you’ve mastered the basic technique, you can run wild with combinations. Just last week I tried a cookies-and-cream version that disappeared before I could snap a picture! Whatever flavors you love, there’s a poke cake variation waiting to be discovered.
Storing Poke Cake
Okay, let’s talk about poke cake storage – because let’s be honest, this dessert rarely lasts more than a day in my house! But if you somehow end up with leftovers (miracle of miracles), here’s exactly how to keep them tasting fresh and delicious.
First rule: always refrigerate. That creamy pudding layer means this cake can’t sit out at room temperature like some desserts. I pop mine in the fridge as soon as we’re done serving, covered tightly with plastic wrap or in an airtight container. It’ll stay perfect for about 3 days – though I’ve never actually tested that limit because it always disappears faster!
Now, about freezing… I learned this lesson the hard way after trying to freeze a leftover slice “for later.” The pudding layer turns weirdly grainy when thawed, and the whipped cream topping just doesn’t hold up. The texture becomes, well, sad. So unless you enjoy disappointing desserts (who does?), just make what you’ll eat within a few days.
Pro tip: If you’re making this ahead for a party, assemble everything except the sprinkles. Add those right before serving so they stay crisp. And if your fridge smells like onions (been there), wrap the cake really well or store it in a cake carrier – nobody wants onion-scented dessert!
One last storage secret: the flavors actually get better after chilling overnight. That pudding soaks deeper into the cake, creating this magical moistness that makes me weak in the knees. So if you can resist eating it right away (good luck with that), your patience will be deliciously rewarded.
Poke Cake FAQs
After sharing this poke cake recipe with friends for years, I’ve gotten the same questions popping up again and again. Let me save you some trouble and answer the big ones right here!
Can I use homemade cake instead of a mix?
Absolutely! While I love the convenience of a box mix (especially when I’m in a hurry), homemade white cake works beautifully. Just use your favorite recipe that makes a 9×13-inch cake. The key is making sure it’s sturdy enough to hold up to all that pudding – overly delicate cakes can get mushy. My go-to is a simple vanilla butter cake with an extra egg yolk for structure.
How do I keep the colors from bleeding together?
Oh boy, did I learn this one through trial and error! The secret is twofold: First, don’t overmix the colored batters once they’re in the pan – just a few gentle swirls with a toothpick. Second, and this is crucial, let the cake cool completely before adding the pudding. Adding it while warm makes the colors run like a bad watercolor painting. Gel food coloring also bleeds less than liquid, so that’s another reason I swear by it.
What’s the best milk for the pudding layer?
Whole milk makes the creamiest, dreamiest pudding, but 2% works fine in a pinch. I tried it once with skim milk when I was desperate and… let’s just say the texture suffered. For extra richness, you can even use half milk and half heavy cream – it’s like pudding turned up to eleven! Just make sure it’s cold when you mix it, or the pudding won’t set properly.
Can I make this ahead of time?
You bet! In fact, I think it tastes better the next day. Assemble the whole cake (minus sprinkles if you’re using them) and refrigerate overnight. The flavors have time to mingle and the pudding soaks in perfectly. Just add your sprinkles right before serving so they stay crunchy. The whipped cream topping holds up surprisingly well for 2-3 days if your fridge is cold enough.
Why did my whipped cream topping deflate?
Oh honey, I’ve been there! The usual culprits are: 1) Your cream wasn’t cold enough, 2) You overwhip it (stop as soon as stiff peaks form), or 3) Your kitchen was too warm. That’s why I always chill my bowl and beaters first. If it’s a hot day, I’ll even place my mixing bowl in an ice bath while whipping. And never, ever use “whipped topping” instead of real cream – that stuff sweats like crazy in the fridge!
Nutrition Information
Now, let’s be real – nobody eats poke cake for its health benefits! But since you asked (or maybe just to ease your conscience before that third slice), here’s the nutritional breakdown. Remember, these numbers can change depending on your exact ingredients – I calculated them using 2% milk and standard brands.
- Serving size: 1 slice (about a 3×3-inch piece)
- Calories: 350 (worth every single one!)
- Sugar: 25g (it’s dessert, what did you expect?)
- Sodium: 300mg
- Fat: 15g (8g saturated – that’s the good creamy stuff!)
- Carbohydrates: 45g
- Protein: 5g (surprisingly not bad for cake!)
- Cholesterol: 60mg
Want to lighten it up a smidge? Swap the whole milk for 2% in the pudding layer and use light whipped topping instead of homemade whipped cream. But honestly? Life’s too short not to enjoy the full-fat version in my book – just balance it with extra veggies at dinner!
Disclaimer: These estimates vary based on specific ingredients used. Values calculated for standard recipe with 2% milk. Consult a nutritionist for exact dietary needs.
Fore more recipes follow me on facebook and pinterest.
Print
Poke Cake Recipe
- Total Time: 45 minutes
- Yield: 12 servings 1x
- Diet: Vegetarian
Description
Poke Cake is a fun and colorful dessert with layers of flavored cake and pudding.
Ingredients
- 1 box white cake mix
- ingredients listed on the box (eggs, water, oil)
- 2 (3.4 oz.) boxes instant cheesecake pudding
- 3 1/2 cups milk
- 2 1/2 cups heavy cream
- 1/4 cup powdered sugar (or more to taste)
- 1 teaspoon vanilla extract
- Blue and red food coloring
- Sprinkles for garnish
Instructions
Preheat the oven to a temperature specified on the box. Grease a 9×13 inches baking dish with baking spray and set aside.
Prepare the cake mix according to the directions listed on the box.
Next, divide the mixture into 3 equal portions. One portion should stay white. Add red food coloring in the second portion, and blue coloring in the third. Stir well until the color dissolves completely.
Then using a spoon, make small droops of each mixture in the bottom of the baking dish. Drops will spread in the greased dish so you should do this quickly. I suggest you drop one color at a time leaving a few inches apart between the drops, then make the drops with the second color, then the third, until you cover the bottom of the pan. Then drop another layer on top until using all mixtures. Finally, tap the baking dish on the counter to flatten the surface, do not spread with the spatula to avoid mixing the colors. Using a toothpick, swirl the colors just a little bit (you want the colors swirled not mixing together). Bake as directed on the box.
When the cake is baked and sits at room temperature for about 10 minutes, poke the cake. Use the handle end of a wooden spoon to poke holes all over the top of the cake, then allow it to cool completely.
In a bowl, combine the instant pudding and milk, whisking until the pudding is dissolved. Before the pudding sets completely, pour it over the cooled cake, trying to fill all the holes completely. Spread remaining pudding on top and place in the fridge to set completely.
When the pudding is set and the cake is completely cooled, top the cake with whipped cream. Mix chilled heavy cream and vanilla extract until soft peaks form. Add powdered sugar and mix until stiff peaks form. Spread over the pudding layer.
Garnish with sprinkles before serving.
Store leftovers in the fridge.
Notes
- Use gel food coloring for vibrant colors.
- Do not overmix the batter to keep colors distinct.
- Chill heavy cream before whipping for best results.
- Prep Time: 20 minutes
- Cook Time: 25 minutes
- Category: Dessert
- Method: Baking
- Cuisine: American
Nutrition
- Serving Size: 1 slice
- Calories: 350
- Sugar: 25g
- Sodium: 300mg
- Fat: 15g
- Saturated Fat: 8g
- Unsaturated Fat: 6g
- Trans Fat: 0g
- Carbohydrates: 45g
- Fiber: 1g
- Protein: 5g
- Cholesterol: 60mg
Keywords: poke cake, dessert, easy cake recipe

