Nothing says “Happy 4th of July” like these showstopping Oreo balls dressed in their patriotic best! I stumbled upon this recipe years ago when I needed a last-minute dessert for our backyard barbecue, and now they’re my go-to treat for every Independence Day. The best part? These little red, white, and blue beauties come together with just five ingredients and zero baking required. Even my baking-challenged brother can make them (and believe me, that’s saying something). They disappear faster than fireworks at midnight, with that perfect combo of crunchy Oreo center and smooth candy coating that’ll have your guests begging for the recipe.
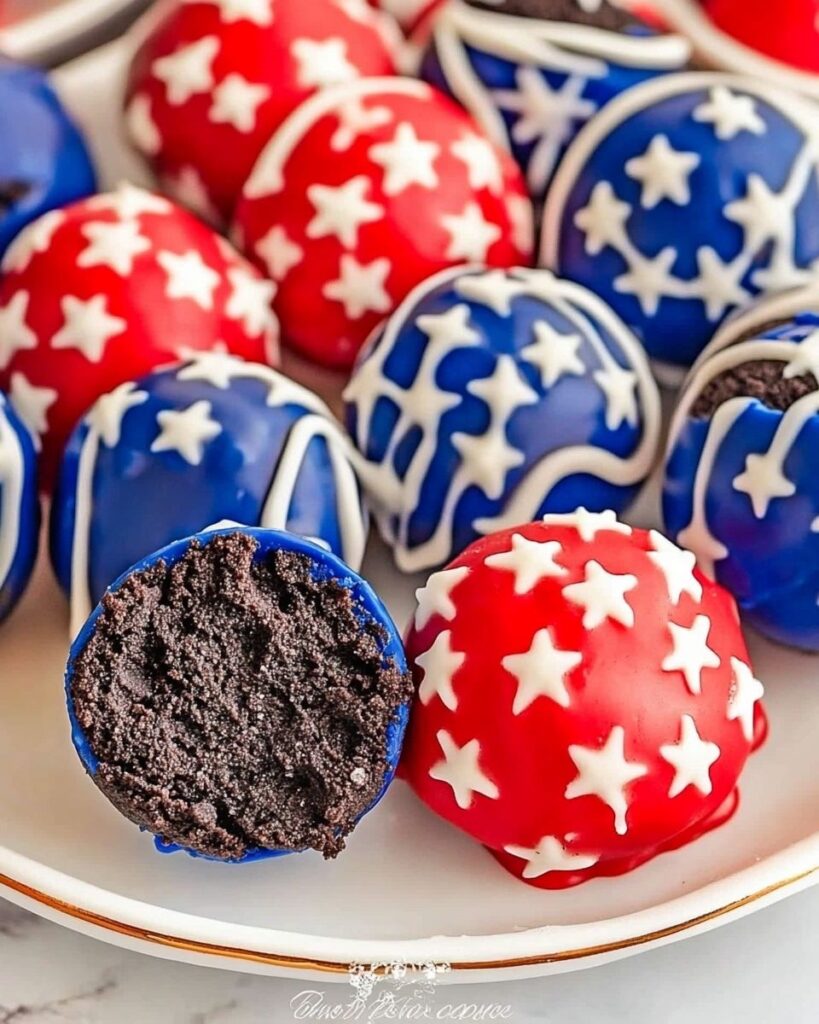
Why You’ll Love These 4th of July Oreo Balls
Trust me, these aren’t just any Oreo balls—they’re little bites of patriotic magic! Here’s why they’ve become my must-make summer treat:
- No oven required – Perfect for when it’s too hot to bake but you still want something homemade
- Foolproof decorating – The red and blue coating hides any imperfections (my first batch was lumpy but nobody knew!)
- Kid-approved fun – My nieces love shaking on the star sprinkles like they’re decorating tiny edible fireworks
- Make-ahead magic – They actually taste better after chilling, so no last-minute stress
- Instant crowd-pleaser – I’ve never brought leftovers home from any BBQ
Ingredients for 4th of July Oreo Balls
Here’s everything you’ll need to make these patriotic treats – and yes, the cream cheese absolutely must be softened! (I learned that the hard way when I tried rushing the process last year.)
- 1 lb 2.12 oz Family Size Oreos – The classic ones work best here, trust me
- 8 oz block cream cheese, softened to room temperature (Philadelphia is my go-to)
- 12 oz bag red candy melts – Wilton’s works perfectly every time
- 12 oz bag blue candy melts – Same brand for color consistency
- ⅓ cup Ghirardelli white melting wafers – For those pretty drizzle stripes
- White star confetti sprinkles – The edible fireworks on top!
See? Just six simple ingredients that’ll have everyone thinking you spent hours in the kitchen!
Equipment You’ll Need
Don’t worry – no fancy gadgets required! Here’s what you’ll pull from your kitchen for these patriotic treats:
- Food processor or blender – My Ninja makes quick work of those Oreos (though a zip-top bag and rolling pin works in a pinch!)
- 2 baking sheets – Lined with parchment to prevent sticking disasters
- Double boiler or microwave-safe bowls – For melting those candy coatings smoothly
- 1.5” cookie scoop – The secret to uniform balls without sticky hands
- Fork and piping bag – For dipping and drizzling like a pro
That’s it! Now let’s get those Oreos crushed and ready for action.
How to Make 4th of July Oreo Balls
Ready to turn those simple ingredients into the star of your dessert table? Grab your apron – I’ll walk you through each step with all the tips I’ve learned from my many Oreo ball adventures (including that time I accidentally made Oreo soup instead of balls… we don’t talk about that).
Step 1: Crush the Oreos
First, toss those Oreos into your food processor and pulse until they look like dark, delicious sand. No processor? No problem! I’ve used a blender (just pulse gently) or even a zip-top bag bashed with a rolling pin when desperate. The key is getting them super fine – you shouldn’t feel any big chunks when you rub some between your fingers. And yes, this includes the creamy centers – they’re the secret glue holding everything together!
Step 2: Mix with Cream Cheese
Here’s where that softened cream cheese becomes crucial. I throw it in my stand mixer (or use a hand mixer) and beat until it’s smooth as frosting – about 1 minute. Then dump in those Oreo crumbs and mix on medium until it looks like the most decadent cookie dough you’ve ever seen. Pro tip: Scrape the bowl halfway through to catch any sneaky dry patches hiding at the bottom.
Step 3: Shape and Chill the Balls
Now for the fun part! Scoop with your 1.5″ cookie scoop (or eyeball tablespoon-sized portions) and roll between slightly damp hands to smooth them out. I line them up on parchment-lined trays like little edible soldiers. Here’s the important part – chill them for at least 2 hours in the fridge! I know, I know, waiting is hard, but this prevents crumbling when you dip them later. Emergency shortcut: 15-20 minutes in the freezer if you’re in a time crunch.
Step 4: Dip in Candy Melts
Melt your blue candy melts first – microwave in 30-second bursts, stirring between each, until smooth as melted ice cream. Work with half the balls at a time (keep the rest chilled). I spear each ball with a fork, dip, tap off the excess (seriously, tap aggressively – too much coating equals messy pools), then slide them onto the tray with a little nudge from a toothpick. Immediately add those cute star sprinkles before the coating sets! Repeat with red melts for the second batch.
Step 5: Decorate and Set
For the finishing touch, melt those white wafers and snip a tiny corner off a piping bag (or use a zip-top bag). Drizzle artistic stripes across your red-coated balls – I like to pretend I’m Jackson Pollock creating edible art. Pop them back in the fridge for 10 minutes to set completely. Voilà! You’ve just made the most patriotic dessert that’ll have your guests oohing and aahing like it’s the actual fireworks show.
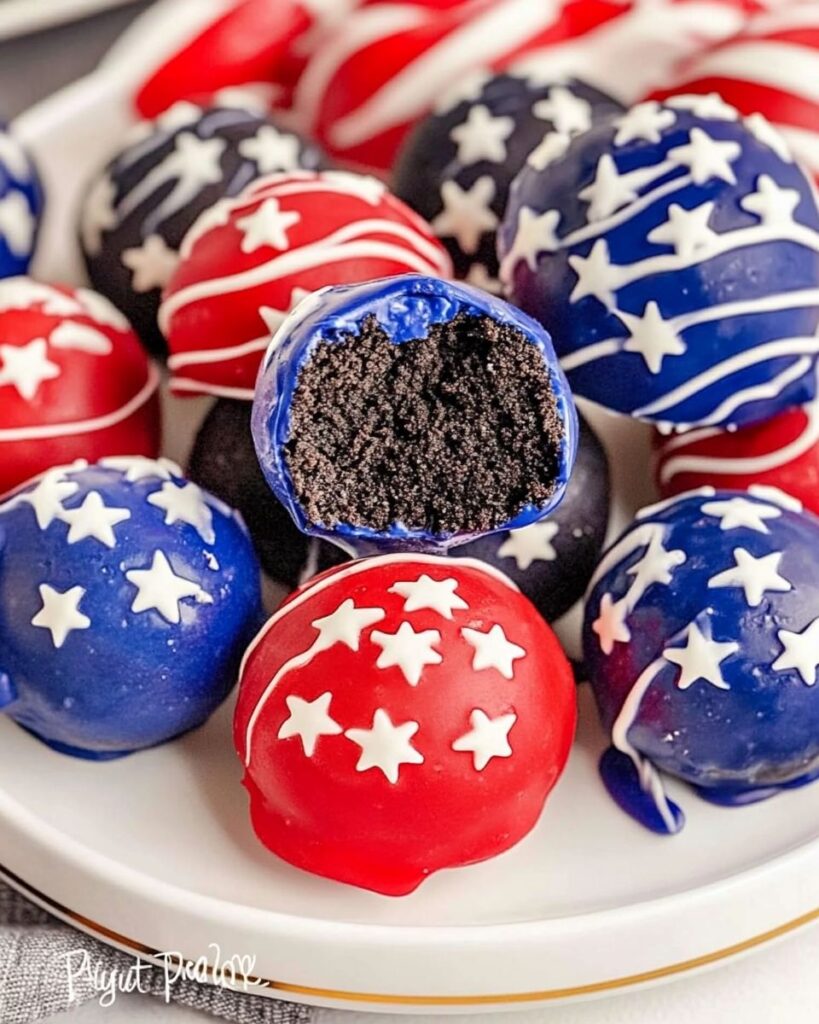
Tips for Perfect 4th of July Oreo Balls
After making dozens of batches (some more successful than others), here are my hard-won secrets for Oreo ball perfection:
- Struggling with thick melts? Add a teaspoon of coconut oil to thin them – just like I did after my first cement-like dipping disaster!
- Lumpy cream cheese? Microwave it for 10 seconds if you forgot to soften it – but don’t let it get melty.
- Sticky hands? Lightly wet your palms when rolling – game changer for smooth balls.
- Crumbly mixture? Add another tablespoon of cream cheese – no one will know.
- Rushed for time? Freeze balls for 15 minutes instead of refrigerating – works like a charm.
See? Even the “mistakes” are fixable – now go make some magic!
Variations for Your 4th of July Oreo Balls
Want to mix things up? Here are my favorite twists on this patriotic treat:
- Dark chocolate lovers: Swap half the Oreos for their dark chocolate cousins – adds a sophisticated bitterness that balances the sweetness perfectly.
- Sprinkle switch-up: Try red, white, and blue nonpareils for extra crunch instead of stars.
- Peanut butter twist: Replace 2 tbsp cream cheese with creamy PB – just trust me on this one.
- Adult version: Add 1 tbsp bourbon to the mixture (and maybe leave out the kids’ portion first!).
Serving and Storing 4th of July Oreo Balls
These little patriotic treats are happiest when kept chilled until showtime! I always arrange them on a platter right from the fridge – the cold makes that candy coating snap satisfyingly when bitten into. They’ll keep beautifully in an airtight container for up to 5 days (if they last that long!). Pro tip: Layer them between parchment paper so the decorations don’t stick together. For parties, I like to set them out in small batches to prevent melting – nothing ruins the red-white-and-blue magic faster than sticky fingers!
Nutritional Information
Let’s be real – these are holiday treats, not health food! But if you’re curious (or just want to plan your portion sizes), here’s the scoop on these patriotic bites. Remember, these numbers are estimates – actual values will vary slightly depending on your exact ingredients and how generous you are with those candy melts!
- Per ball (serving size): About 180 calories
- Sweet stuff: 15g sugar (thanks to those delicious Oreos!)
- Fat content: 10g total fat (6g saturated from the cream cheese and candy melts)
- Protein: 2g per serving
- Sodium: 120mg
My philosophy? Enjoy a couple guilt-free – it’s the Fourth of July after all! Just maybe balance them out with some watermelon at the BBQ.
Frequently Asked Questions
Q1. Can I freeze 4th of July Oreo balls? Absolutely! These freeze like champions. Just pop them in an airtight container with parchment between layers and freeze for up to 2 months. Thaw in the fridge overnight – the texture stays perfect. I always make extras to stash away for last-minute summer parties.
Q2. Why do my Oreo balls keep cracking when I dip them? Been there! This usually means they weren’t chilled enough. Make sure they’re fridge-cold (at least 2 hours) before dipping. If cracks still happen, just drizzle extra melts over the flaws – they’ll taste just as amazing!
Q3. Can I use regular chocolate instead of candy melts? You can, but candy melts give that smooth, vibrant color and set firmer. If using chocolate, add a teaspoon of coconut oil per cup to help with dipping. Dark chocolate makes a delicious (if less patriotic) alternative!
Q4. How far in advance can I make these? They’re actually better made 1-2 days ahead! The flavors meld beautifully. Just store refrigerated and add sprinkles right before serving so they stay crisp. Perfect for stress-free party prep.
Fore more recipes follow me on facebook and pinterest.
Print
4th of July Oreo Balls Recipe
- Total Time: 2 hours 30 minutes (includes chilling)
- Yield: 36 balls 1x
Description
Festive, fun, and super easy to make, these 4th of July Oreo Balls are the perfect patriotic sweet treat with creamy centers and colorful candy coatings!
Ingredients
1 lb 2.12 oz Family Size package Oreo Cookies
8 ounce block cream cheese, softened to room temperature
12 ounce bag red candy melts
12 ounce bag blue candy melts
⅓ cup Ghirardelli white melting wafers
White star confetti sprinkles for topping
Instructions
1. Line two baking trays with parchment and set it aside.
2. Place the Oreo cookies in a food processor or high speed blender and pulse into fine crumbs.
3. In a large mixing bowl with a hand mixer on high speed, beat the softened cream cheese until smooth.
4. Add the Oreo crumbs to the bowl and mix on medium speed until well combined.
5. Using a 1.5” cookie scoop, scoop up even sized balls and roll them smooth with your hands. Place on the prepared trays.
6. Chill the trays in the refrigerator for 2 hours or freeze for 15-20 minutes if in a hurry.
7. Remove one tray from the refrigerator. Melt blue candy melts over low heat or in the microwave, stirring every 30 seconds.
8. Use a fork to dip each ball into the blue melts, tap off excess, and place back on the tray. Immediately add white star confetti. Refrigerate to set.
9. Remove the second tray from the refrigerator. Melt red candy melts as above.
10. Dip each ball into the red melts, tap off excess, and place back on the tray.
11. Microwave white melting wafers in a piping bag in 30-second intervals until smooth. Snip the tip and drizzle over red coated balls.
12. Refrigerate for 10 minutes until set. Keep refrigerated until serving. Enjoy!
Notes
Keep refrigerated until ready to serve for best texture and flavor.
- Prep Time: 30 minutes
- Cook Time: 0 minutes
- Category: Dessert
- Method: No-bake
- Cuisine: American
Nutrition
- Serving Size: 1 ball
- Calories: 150
- Sugar: 14g
- Sodium: 80mg
- Fat: 8g
- Saturated Fat: 5g
- Unsaturated Fat: 2g
- Trans Fat: 0g
- Carbohydrates: 18g
- Fiber: 0g
- Protein: 2g
- Cholesterol: 10mg
Keywords: 4th of July desserts, patriotic treats, Oreo balls, easy no bake desserts

